These are some of the procedures that I did in the duration of this project. These are some images wherein I performed some edits to make it more appealing and look more professional.

Media Used: Adobe Photoshop CS6; Adobe Illustrator CS6
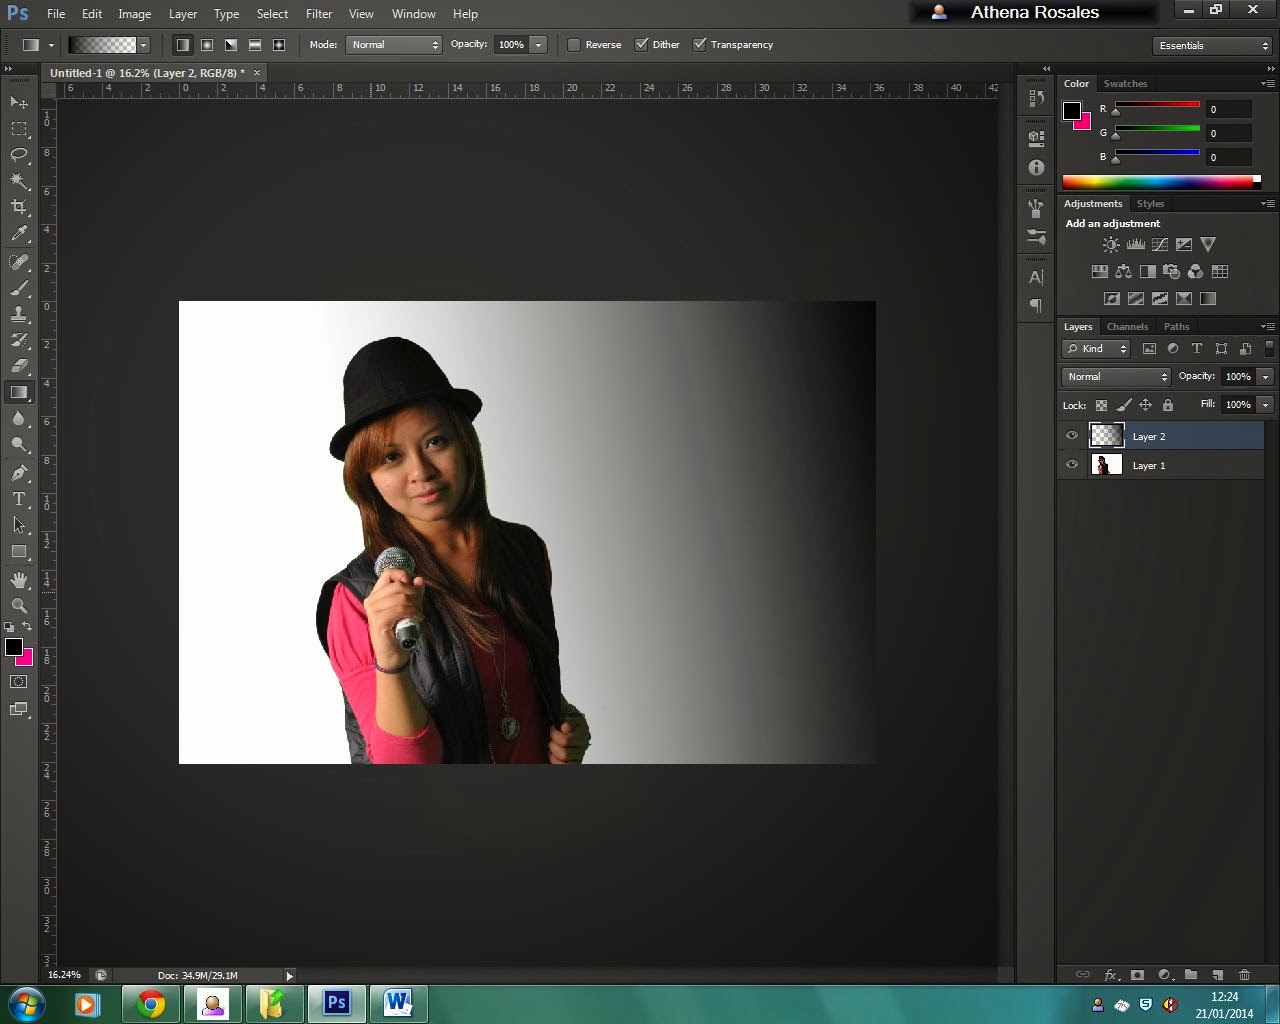
I have used the Paint bucket tool for the gray background and used the Gradient tool to add a shadow.

The black gradient relates to lighting of the photo. By using the magic wand tool and deleting the green background of the original photo, I had pasted the photograph to the background.

I have used the gradient tool to add a backlight to the microphone area.

I have used the gradient tool to add the pink shadow. This colour relates to my colour scheme. I had also used the Elliptical Marquee tool and used stroke and fill to create artificial camera flares and by changing the opacity, the colours I have used became lighter.

I have used the paint bucket tool to manipulate the colours of the name. I have also placed them in different layers so I can move the text to create the 3D effect.

By using the text tool and the rulers as a guide, I added my article for the artist "REIKA".

By using the rectangular marquee tool and copying the logo on the end of the page, the page adheres to the magazine housestyle and the consumer can create the link to the cover page and the feature article.

I have used the elliptical marquee and the fill and stroke function to create the bubble for the pull quotes.

I have used the Text tool to add the pull quotes and used the font type "Hobo" to make it more bubbly and appealing which relates to the personality of my new artist.
===============================================================
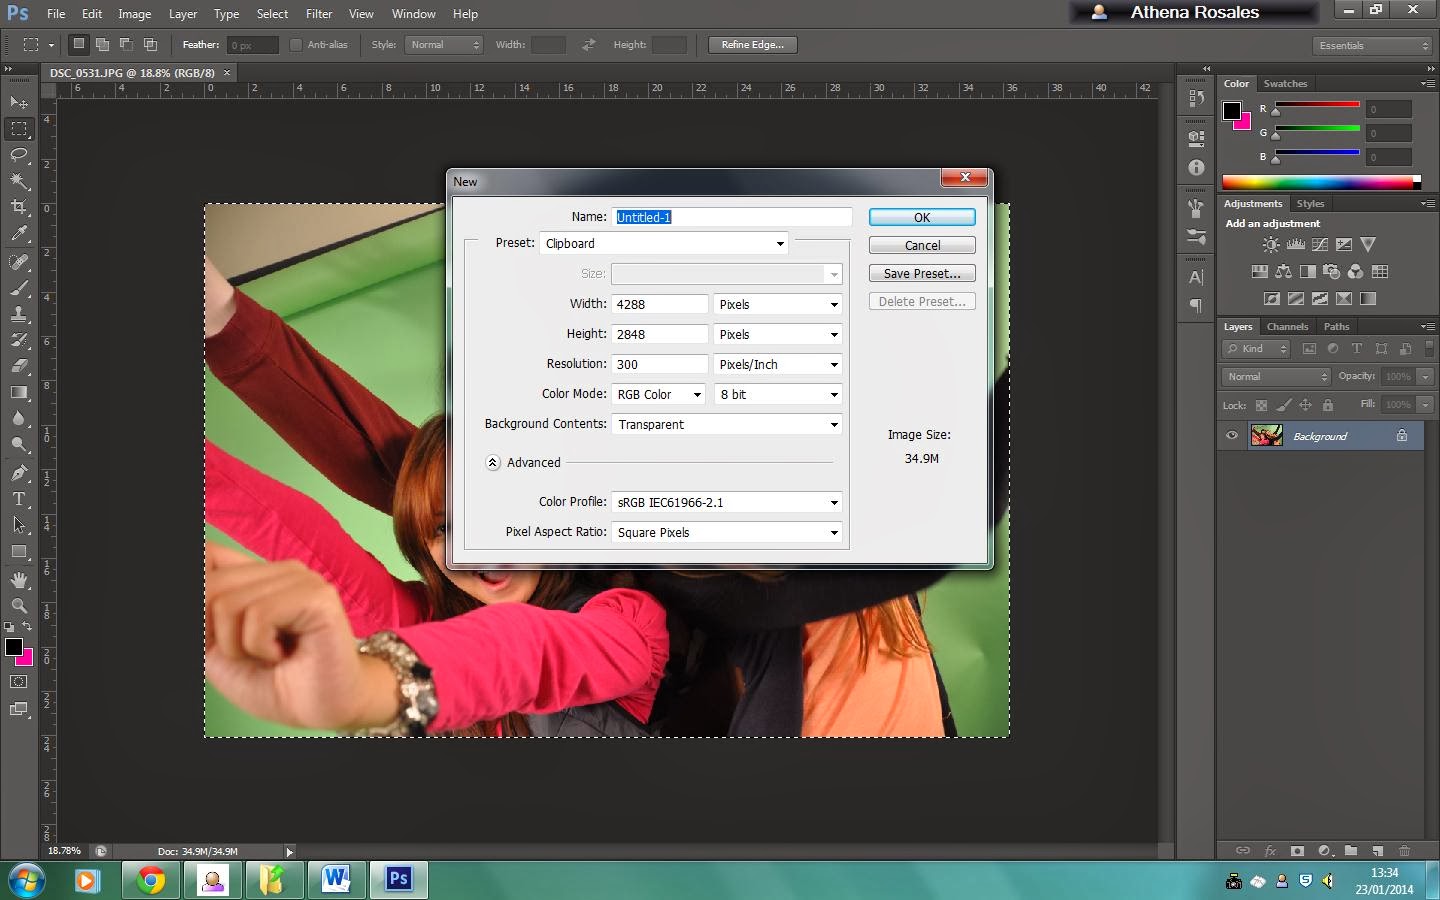
I have used the magic wand tool to delete the background and transform it into a transparent one. I also used the Clone Stamp tool to cover up the green bits left from the background on the hair.

I have used the Paint bucket tool to add the white background and the gradient tool to add the shadow on the background which affects the lighting of the photo.

I have saved the .psd (Photoshop) file and exported it to a .jpeg (Photo) file. I have inserted this in an .ai (Illustrator) file to add the article and create even columns.

In this part, I have created the columns and used the Text Wrap to make the text surround and follow the shape of my photo.

I have cleared the background of the image so I can still edit some parts in photoshop. By exporting the .ai file to a .png file, I can still manipulate minor adjustments on the background and gradients.

I have opened the file to Photoshop and changed the background to grey by using the Paint Bucket tool.

I have used the gradient tool to add the shadow.

I have used the gradient tool to add the lighting on the microphone which relates to my first few photographs.

I have used the rectangular marquee tool to create a rectangle and I have used the gradient tool to add a white gradient on the selected area. I have change the opacity to this gradient.

I have copied this rectangle and copied them into different layers. By doing this, I can change the positions and angle without affecting any of the unselected objects. I have used the text tool to add the pull quote.


The black gradient relates to lighting of the photo. By using the magic wand tool and deleting the green background of the original photo, I had pasted the photograph to the background.
I have used the gradient tool to add a backlight to the microphone area.
I have used the gradient tool to add the pink shadow. This colour relates to my colour scheme. I had also used the Elliptical Marquee tool and used stroke and fill to create artificial camera flares and by changing the opacity, the colours I have used became lighter.
I have used the paint bucket tool to manipulate the colours of the name. I have also placed them in different layers so I can move the text to create the 3D effect.
By using the text tool and the rulers as a guide, I added my article for the artist "REIKA".
By using the rectangular marquee tool and copying the logo on the end of the page, the page adheres to the magazine housestyle and the consumer can create the link to the cover page and the feature article.
I have used the elliptical marquee and the fill and stroke function to create the bubble for the pull quotes.
I have used the Text tool to add the pull quotes and used the font type "Hobo" to make it more bubbly and appealing which relates to the personality of my new artist.
===============================================================

I have used the magic wand tool to delete the background and transform it into a transparent one. I also used the Clone Stamp tool to cover up the green bits left from the background on the hair.
I have used the Paint bucket tool to add the white background and the gradient tool to add the shadow on the background which affects the lighting of the photo.
I have saved the .psd (Photoshop) file and exported it to a .jpeg (Photo) file. I have inserted this in an .ai (Illustrator) file to add the article and create even columns.
In this part, I have created the columns and used the Text Wrap to make the text surround and follow the shape of my photo.
I have cleared the background of the image so I can still edit some parts in photoshop. By exporting the .ai file to a .png file, I can still manipulate minor adjustments on the background and gradients.
I have opened the file to Photoshop and changed the background to grey by using the Paint Bucket tool.
I have used the gradient tool to add the shadow.
I have used the gradient tool to add the lighting on the microphone which relates to my first few photographs.
I have used the rectangular marquee tool to create a rectangle and I have used the gradient tool to add a white gradient on the selected area. I have change the opacity to this gradient.
I have copied this rectangle and copied them into different layers. By doing this, I can change the positions and angle without affecting any of the unselected objects. I have used the text tool to add the pull quote.
This is my final feature article spread page for my Bebop! Magazine with the improvements made and the feed backs take in consideration.